advfe-unified-workspace
Advanced Front End: Preparing the Django API for development
A few things to prepare the Django API for the combined workspace.
Next, we need to adjust the Django API part of the project to create some new settings and remove code that was required when the projects were in separate repositories.
Preparing your Database
If you have not deployed your DRF project yet, you will need to use PostgreSQL from Code Institute to create a Postgres database instance and make migrations into it. If you need a reminder on how to do this, the steps can be found in the deployment section of the Django REST Framework module in the LMS.
If you have already deployed your DRF project to Heroku, you will already have a CI Postgres database and can continue to the next section.
Determining your local development environment URL
To determine what your development environment URL is for the subsequent steps, run the server with python3 manage.py runserver and check the URL output in the terminal next to “Starting development server at”.
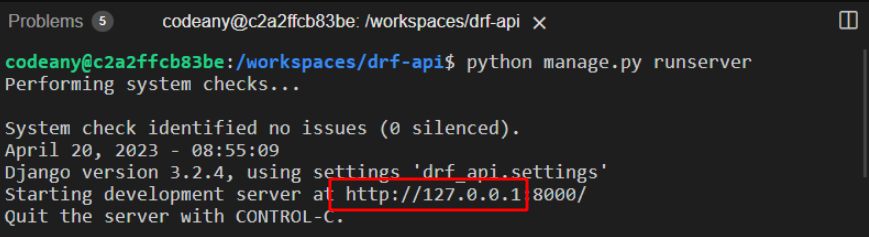
Stop the server (CTRL+C on Windows or CMD+C on MacOS) when done.
Preparing your Environment Variables
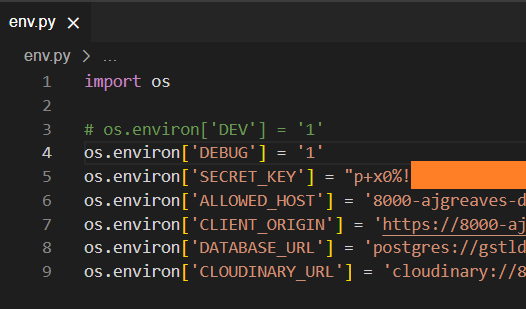
In your env.py file, make the following changes:
-
Comment out the DEV environment variable. This ensures that the application will respond with JSON
-
Remove the CLIENT_ORIGIN_DEV environment variable, if you have it
-
Add a new key DEBUG with a value of ‘1’
This will allow you to see Django's logs in the terminal while keeping your JSON responses and will give you a clearer view of errors for debugging across the two parts of the project.
-
Add a new key ALLOWED_HOST with the value of your development environment URL, wrapped in quotes
Ensure you remove the http:// from the beginning, and the trailing slash / from the end of the development environment URL.
-
Add a new key CLIENT_ORIGIN with the value of your development environment URL, wrapped in quotes
This string should include the http:// at the beginning, but the trailing slash / should be removed.
-
Ensure you have a key for DATABASE_URL set to the value of your PostgreSQL from Code Institute database URL.
-
Ensure you have a key for CLOUDINARY_URL set to the value of your Cloudinary URL
Install urllib3
Open your requirements.txt file and check whether it contains the urllib3 dependency. If it does, you can skip this part. If it does not, please proceed.
urllib3 is installed automatically with more recent versions of Cloudinary, however if you're using an older version of Cloudinary, urllib3 may not have come with it, so you need to install it manually.
-
Ensure your terminal location is in the root directory, then install urllib3 with the following command
pip3 install urllib3==1.26.15 -
Add this dependency to your requirements.txt file with the following command
pip3 freeze > requirements.txt
Revert psycopg2-binary to psycopg2
This part only applies if you had to install urllib3 and update requirements.txt in the previous step. If not, please skip this part and proceed to the next section of this guide.
In requirements.txt, locate the line with the dependency psycopg2-binary.
psycopg2-binary==2.x.x
In the line, manually delete the -binary part, leaving the rest (including the version number) unchanged, like this:
psycopg2==2.x.x
Remember to save the file.
Up Next
We must update a few things in the settings of our Django application, we will take you through those next.