deployment-docs
Python Essentials (PP3) : Environment variables
To provide secret keys and some further required configuration details, environment variables are added to the service.
During the development process you may have used a creds.json file which contained sensitive information. For the application to perform correctly, this information is required in the production environment. Luckily, Render provides a couple of ways to give your application access to these details without exposing them to the public.
Individual Variables
This allows the addition of individual environment variables.
Secret File
This file will be available ‘behind the scenes’, it is not accessible to the public so the security and secrecy of its content are maintained.
This also acts as a nice backup location of production environment variables should a Gitpod workspace be lost without another external backup of the creds.json file.
Process
-
Scroll down and click “Advanced”

-
Click “Add Environment Variable”

-
Add the following environment variables
Key Value PORT 8000 PYTHON_VERSION 3.10.7 
The
PORTvalue is required for the Python mock terminal program - do not change it!If your project does not require a
creds.jsonfile, skip to the next page. -
Open a new browser tab and navigate to your Heroku dashboard and open the Settings tab of your existing app

-
Click “Reveal Config Vars”

-
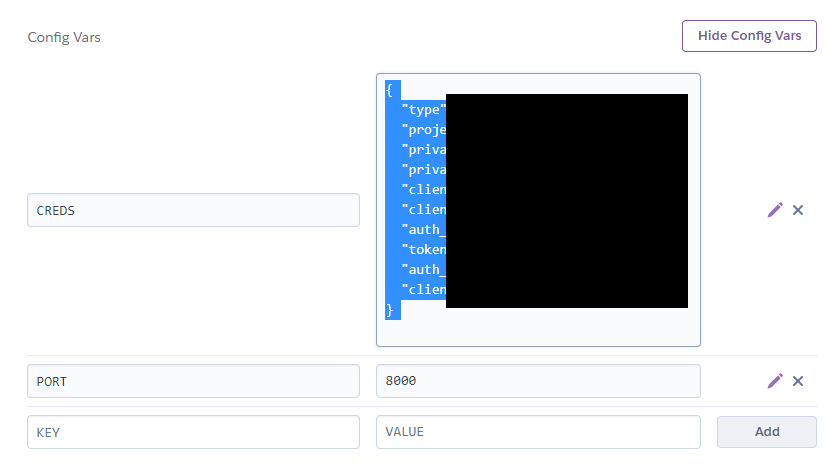
Copy the value of your CREDS variable to your clipboard. Some of the content has been redacted from the image here, but the entire content of the variable has been selected

-
Back in Render, click “Add Secret File”

-
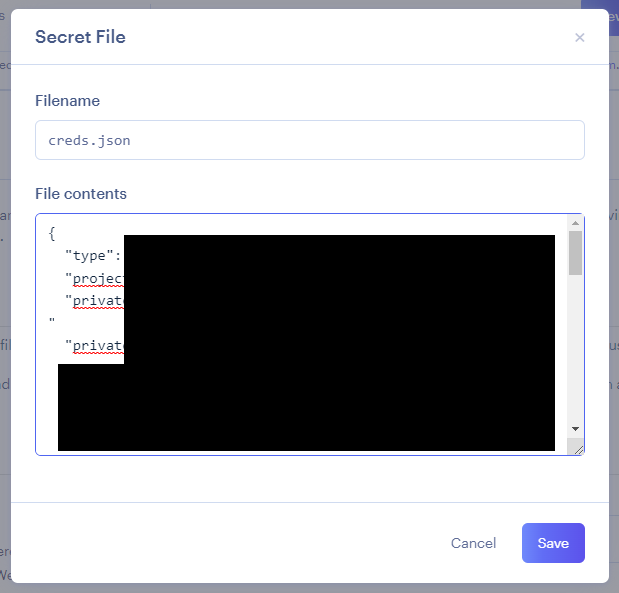
Paste in the copied text to the File contents text area input and ensure the Filename is creds.json. Again, some of the info has been redacted from the image, but the entire copied content has been pasted in

Make sure to click "Save" when done.
Up Next
The final option is whether to Auto-Deploy. The two options are explained in the following page.